
NOVEMBER 14, 2016
1973 Honda CB500 Fork Rebuild - Franks Forks
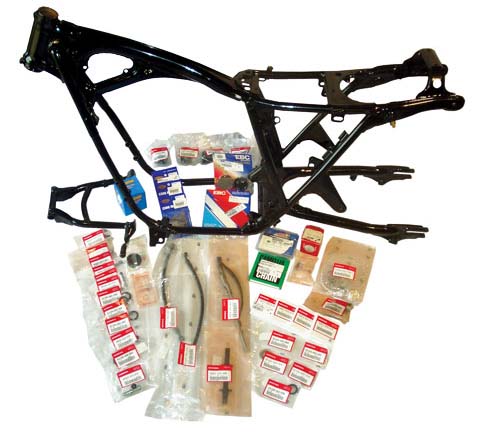
In part 1 of Project Cafe 1973 Honda CB500, we had the bike stripped to the frame and we were making a parts list. We'd just gotten our frame, swingarm and centerstand back from Stuart Armstrong at Custom Coatings & Metal in Lawrence, Kan. That's the frame pictured above with a collection of new parts from BikeBandit.com, and we're still drooling over how well it came out. Now we just have to get the engine back in and all the other parts back on without ruining Stuart's great work!
Fork rebuild
A major goal for this project is to give step-by-step instructions and advice on rebuilding and installing certain components. The fork tubes on our bike were ruined. When we removed the headlight brackets, we discovered they had trapped moisture inside them, rusting the upper 4 or 5 inches of the tubes. Although probably structurally sound, there's no way we'll give the bike away with bad parts on it, so we called up the friendly folks at Forking by Frank (847-475-1003) and ordered a brand new pair of fork tubes for the CB500. Custom-made (Honda no longer makes them), the tubes are excellent.
So follow along and learn how to rebuild a set of Honda CB500 forks!
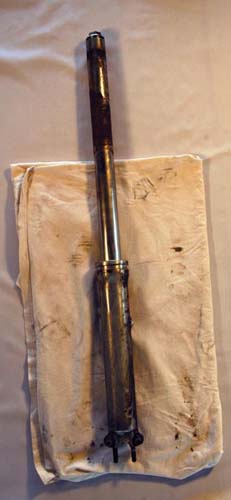
We're starting with a full fork leg that's been removed from the bike. Once the front fender, front wheel and brake assembly have been removed, the pinch bolts at the triple tree and the pinch bolts on the lower steering assembly can be loosened, which allows the fork leg to slide down and out of the steering head.
Loosen the nut on the lower outside of the fork leg and drain the fork oil. Carefully compress the fork several times to help it drain. Remove the cap atop the fork leg, and the spring and damper rod will pop up. Remove the nut atop the damper rod, then pull the spring out of the fork leg. There is a metal bushing that the spring sits on that will now be loose on the damper rod. Slowly turn the leg over, and this bushing should fall out. Finish draining the fork leg.
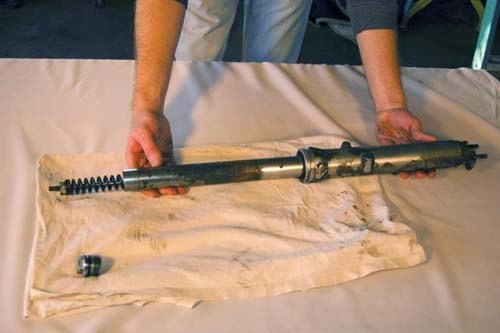
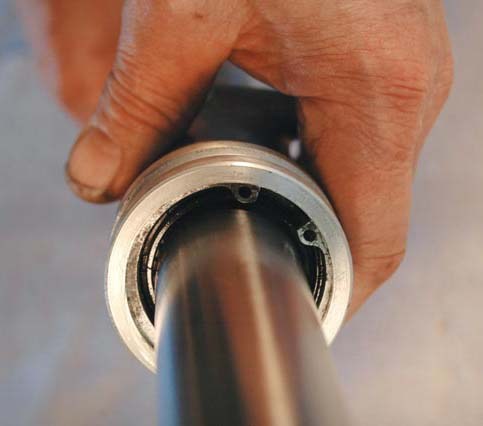
Firmly grab the lower fork leg, and pull the fork tube up and out of the leg. Remove the Allen-head bolt in the bottom of the fork leg. Carefully put the bottom of the fork leg in a vise, then grab the rod and pull the damper rod out. It may take several firm pulls on the rod before it will come loose from the fork leg.
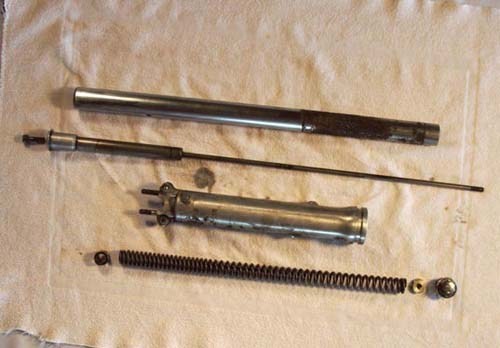
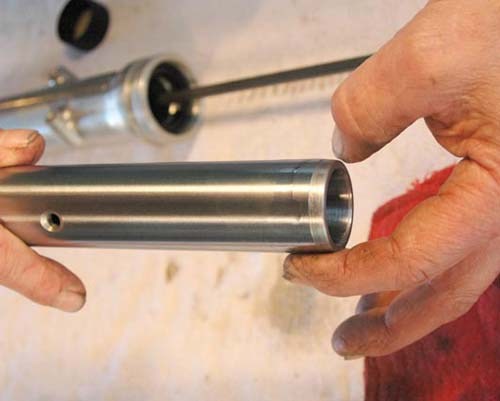
Here are all the parts so far. This leg is almost completely taken apart. From top to bottom are the fork tube (badly pitted from rust), damper rod, lower fork leg, and the fork bushing, spring, damper nut and fork cap.
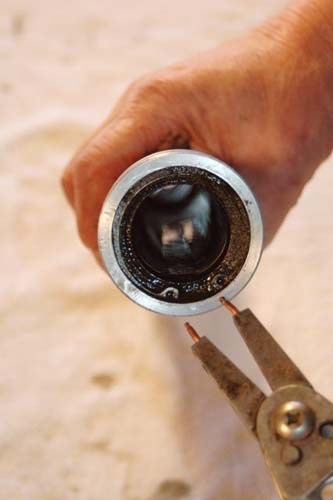
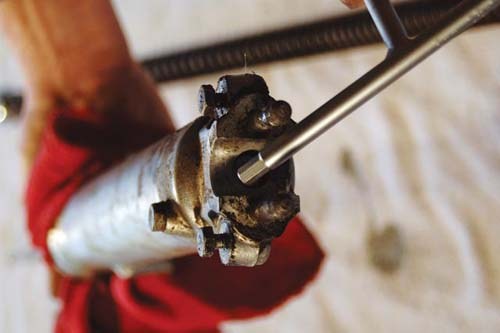
The last thing we need to remove is the fork seal. A circlip holds the seal in place. Using a pair of circlip pliers like you see here (or needle-nose pliers if tha's all you have), grab the two ring ends of the clip and squeeze. Carefully work the circlip out of the fork leg.
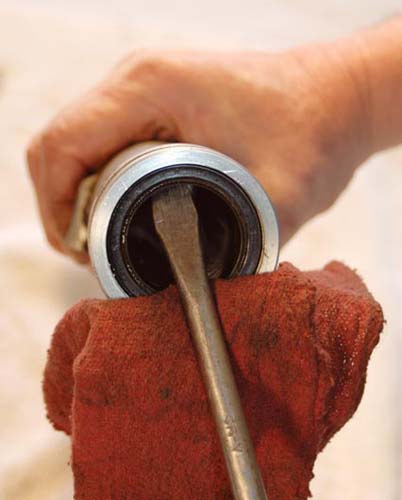
Using a large blade screwdriver, carefully pry the seal out of the fork leg, working your way around the seal. Use a rag, as shown here, between the pivor point of the screwdriver and the fork leg to protect the finish on the fork leg. Clean all metal parts with degreaser or something like Simple Green.
Now it's time to reassemble the fork. Insert the damper rod back into the bottom of the fork leg. Put a bit of blue thread locking compound on the bolt, and carefully thread it through the fork leg, making sure it threads nicely into the damper rod.

Find or buy a 2-foot-long piece of 1.5-inch PVC pipe. Lightly grind down the outside edge of the pipe until it will slide inside the edge of the fork leg. Then set your new seal, sealing lip pointing down, into the fork leg, and press it as far into the leg with your thumbs as it will go.
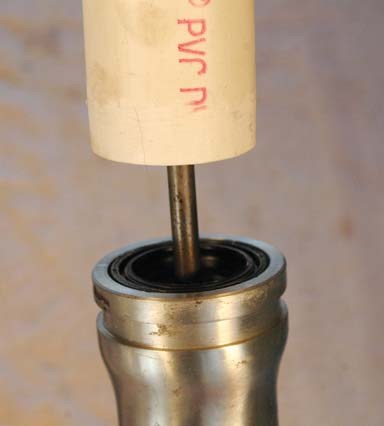
Set the fork leg up on its end with the bottom of the leg braced on a piece of scrap wood on your workbench. Slide the piece of PVC pipe over the damper rod down so it's sitting right on top of your seal.
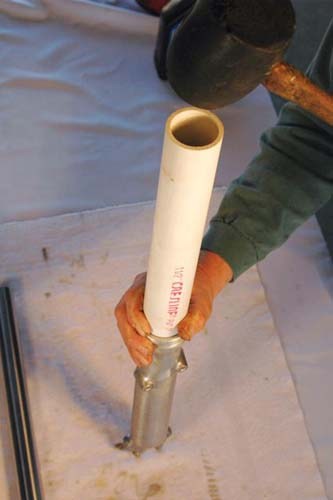
Using a rubber mallet, strike the top of the PVC pipe with several firm, even blows. Check the seal to see if it's driving into the leg evenly.
If it's not, lightly tap around the edges of the pipe, working your way in a circle. Going back and forth, drive the seal fully into the leg.
You'll be able to feel the difference in the blows once the seal has hit the bottom edge of the recess. This is what your seal should look like once it's fully seated.
Reinstall the circlip using your needle-nose or ciclip pliers. Make sure it is evenly seated in the recess in the edge of the fork leg.
Using a bit of fork oil, lube the bottom couple inches of the fork tube. Slide the fork tube back into the fork leg.
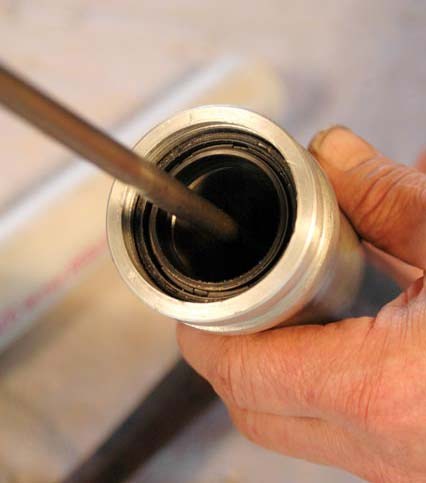
Once your damper, seal, circlip and fork tube are installed, the lower part of your fork is complete.
Here you can just see the circlip inside the fork leg. If you don't plan to use fork gaitors, your next step would be to slide a dust seal over the top edge of the lower fork leg.
We haven't decided which we'll be using yet, so we're going to skip that step and finishing assembling our forks.

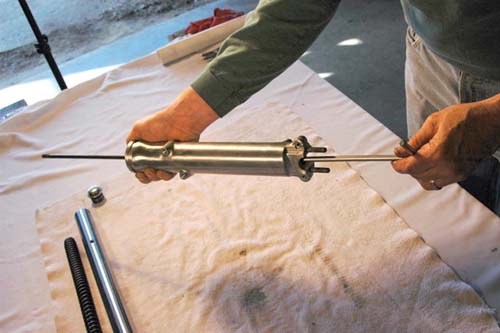
Grab the top end of the damper rod, and add the fork oil. For our CB500 we used 5.5 ounces of 10 weight fork oil.
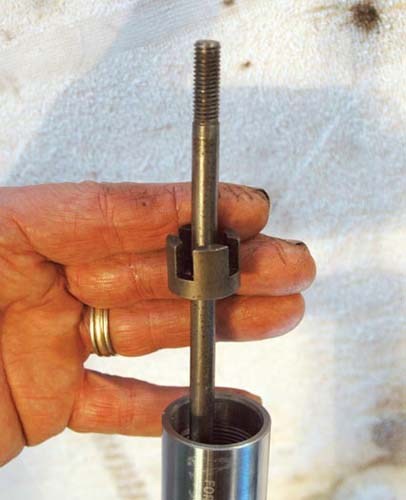
Now slide the bushing back onto the damper rod, with the castellated end facing up as shown here. Take the spring and slide it back into the fork leg.
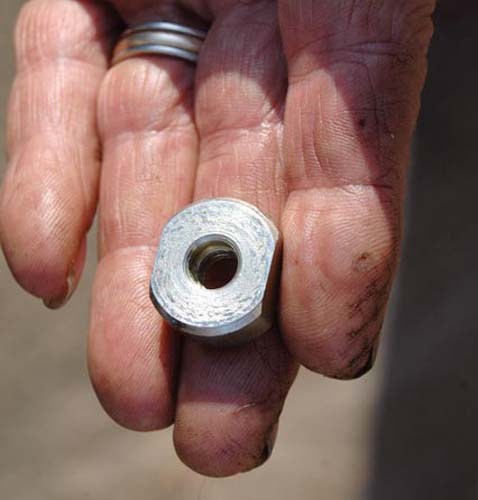
Take the damper nut and look for the shouldered edge. Install the nut onto the damper rod, making sure the shoulder faces down against the spring.
Carefully, use a pair of vise grips to hold the damper rod. Tighten the damper nut as tight as possible using just the vise grips to hold the rod
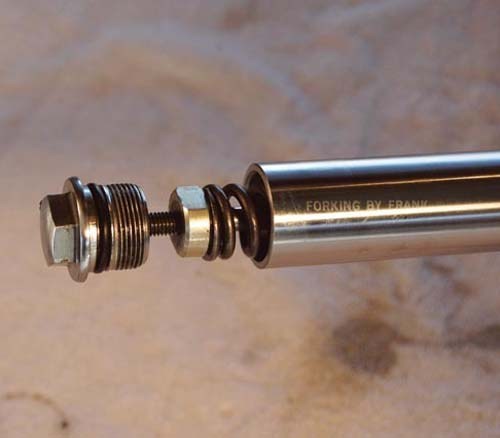
Screw the fork cap back onto the top of the damper rod as far as it will go by hand. Smear the O-ring at the edge of the fork cap with a coating of fork oil.
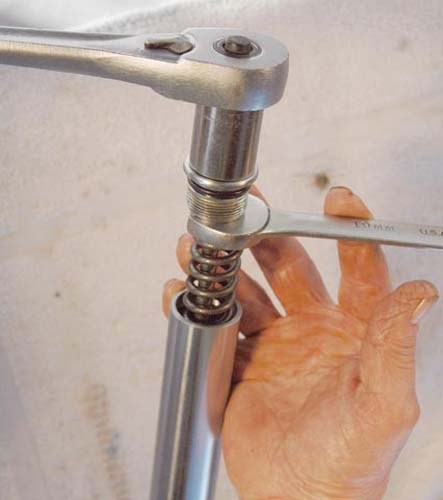
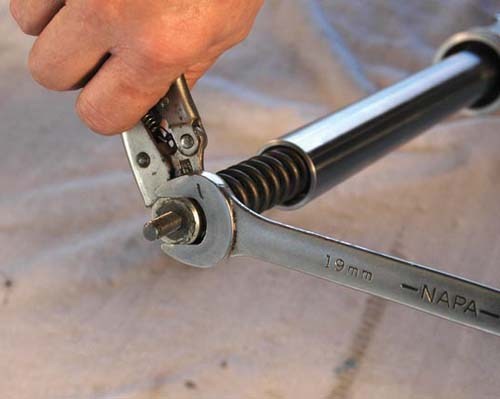
Use a wrench to hold the damper nut, and another to tighten the fork cap onto the top of the damper rod.
Once this is tight, hold the fork tight and compress the spring; using a socket wrench, tighten the cap into the fork tube.
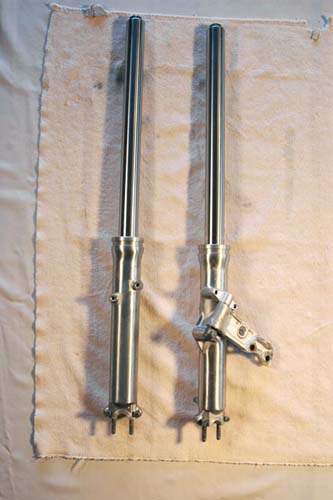
Your fork is now rebuilt!
Repeat these steps on your other fork leg, reinstall the legs into the triple-clamp, install the front wheel and fender, reassemble the front brake, and you're ready to go!